|
|
1560 Broadway Suite 1600
Denver, CO 80202
Phone 303 866 2723 Fax 303 866 4266 |

SURDS WEBSITE
_____________________________________
User’s Guide
Last Modified (address) 7/8/08;
Previous Edit: 7/29/2005;
Previous Edit: 8/4/2004
TABLE OF CONTENTS
SURDS OVERVIEW
The SURDS Data Submission Website enables Higher Education institutional users to login to a CCHE web-based application to submit and validate text files.
The purpose of the website is to provide institutional users with an easy-to-use, efficient system that reduces the amount of time lost in the communication process between institutional users and CCHE staff who process the data.
Upon successful submission and validation of a text file, users are presented with summary data describing their data submitted and is used as a tool to help the institution verify the validity of the data that is processed by CCHE (helps institutions determine if CCHE and/or institution are in agreement in regards to the specific data being processed). This in turn helps the institutions determine if they are ready to “Sign Off” on the data.
![]()
SYSTEM REQUIREMENTS
The SURDS Data Submission Website utilizes Microsoft technologies and therefore requires that the client computer have the following hardware and software installed:
Ø Windows 98 / 2000 / XP
Ø Internet Explorer 5.0 or higher (Netscape not supported); This website does contain a Javascript menu that may be blocked by your browser if you have your browser security settings at HIGH. You can verify your settings by clicking "Tools" / "Internet Options" / "Security" tab from your browser menu.
Ø Internet Connectivity (DSL, Broadband, or T1)
![]()
LOGGING INTO WEBSITE
To access the website, go to the following address:
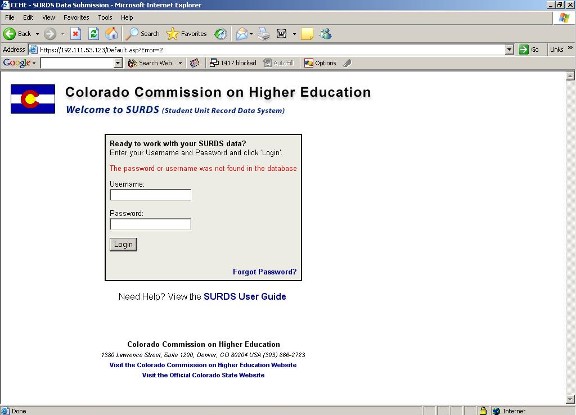
https://surds.colorado.gov (see Figure 1)
You may first be presented with a “Security Alert” box stating that you will be communicating data in an encrypted format (for security purposes). Click “Yes” to proceed.
(Figure 1)
Enter the assigned username and password combination assigned by CCHE and click the “Login” button (see Figure 1). The username/password combination is sent over the Internet back to CCHE webserver in an encrypted format for security purposes.
Values are required for the username and password textboxes. If either or both are left empty, a message is displayed to the user indicating so. If the username/password combination is incorrect the user will be notified and asked to re-enter username and password values (see Figure 2). Acceptable characters for these fields are A-Z, a-z, 0-9, and characters @,!,#. Note: no spaces allowed.
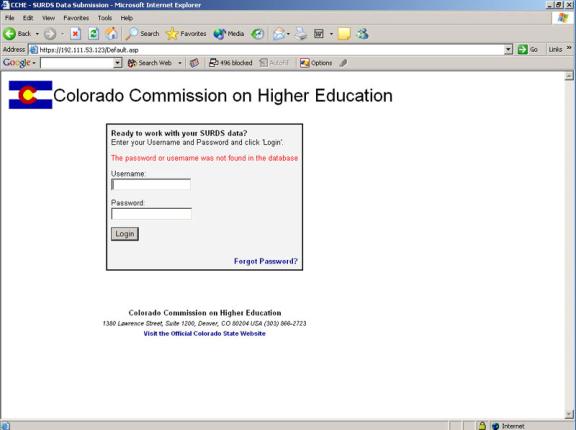
(Figure 2)
If you have forgotten your password, enter your username, click “Forgot Password?” and your password will be sent to the email that is on record for that username. Contact CCHE if you have any problems or your email has changed since the account was established.
If unable to login, contact CCHE to verify username/password
credentials.
Upon successful login, the “Main Hub” is displayed (see Figure 3). The “Main Hub” is the primary navigation point from which all functionality is accessible. Submitting a file for validation, viewing current submission status of a file, and viewing errors or reports are all accessed from this page.
![]()
SITE NAVIGATION
(Figure 3)
The navigation menu is located at the top of each page. Once successfully logged in to the site, this navigation menu persists from page to page.
Main Navigation
Ø Logoff – This option ends your session and returns you to the login page.
Ø Main Hub – This option returns the user to the Main Hub, regardless of their location.
Ø Documentation – Allows the user to view documentation including the Data Dictionary, File Layouts, and Field Definitions. These files contain specific validation rules as they apply to a specific file-type. The file layout includes a template displaying the layout of the textfile and how many characters and character types of all data fields. The Data Dictionary contains details on every field including edit specifications, field length, and summary of its purpose and use.
Sub Navigation
Ø File Type(s) and Report Term(s) make up a sub-menu for the user to link directly to a specific term. These options will change from time to time as new terms become available.
Ø On secondary screens, the user will have links to “Current Files” and “Approved Degrees.”
At the Main Hub page, select the tab that refers to the file type with which you wish to work. Figure 4 displays Enrollment files.

(Figure 4)
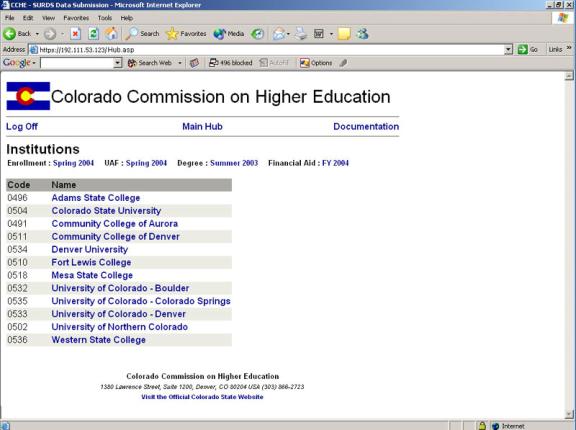
The Main Hub provides users access to work with specific filetypes (i.e., Degrees, Enrollment, Undergraduate Applicant, Financial Aid) and specific institutions.
To begin the process of submitting a file, click the tab with the appropriate filetype name (only ‘Degrees’ tab will list institutions currently as it is the only file CCHE is accepting at current time), and then click on the institution name from the list (see Figure 5).
![]()
SUBMITTING A FILE

(Figure 5)
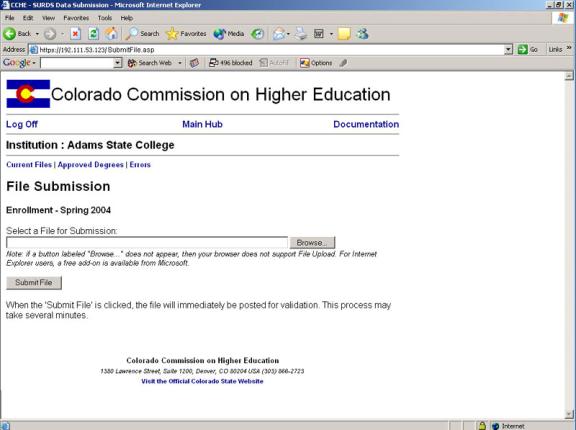
Before the first file submission occurs, a message is displayed verifying that a file has yet to be submitted. Click on the ‘Submit File’ button (see Figure 5). If a file has been submitted, the user can submit a new file in order to replace the existing data.
(Figure 6)
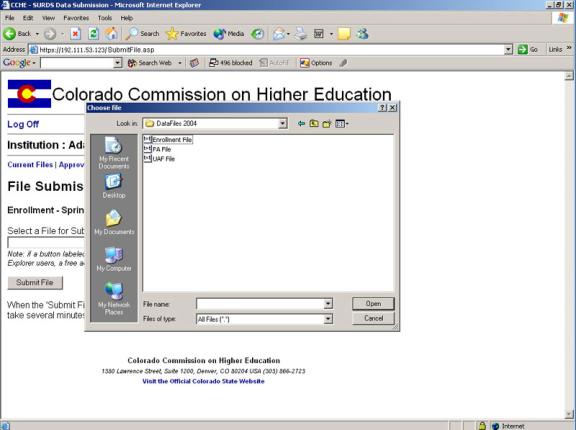
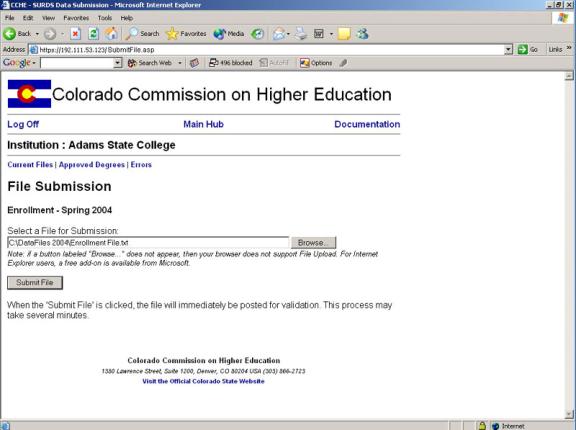
After clicking “Submit File”, on the following page, click the “Browse” button (see Figure 6) and navigate to the appropriate fixed-length text file on the client machine (user’s computer).
Select the file and click the ‘Open’ button (see Figure 7).
(Figure 7)
Once the file has been selected to submit (verify that the path to the file is in the “Select a File for Submission” text box), click the “Submit File” button to begin the validation process.
(Figure 8)
![]()
VALIDATION PROCESS
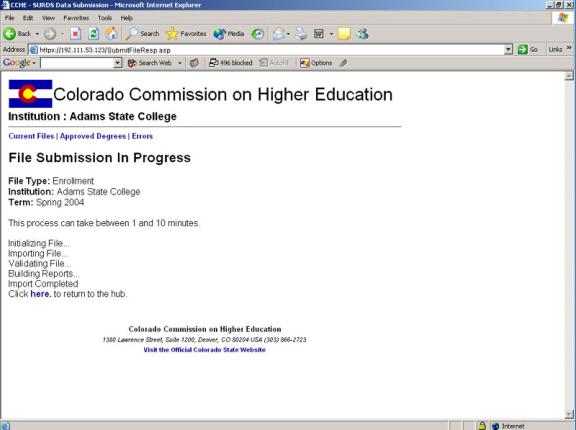
Once a file has been selected and the “Submit File” button is clicked, the validation process begins and the following steps occur:
(Figure 9)
1) The fixed-length text file is transmitted over the Internet from the user’s computer to CCHE’s server.
2) CCHE server checks the filetype of the submitted file, and if the file extension is not .txt, the user is given an error message stating that the file was not received by CCHE because the correct filetype was not submitted. The user must resubmit a valid filetype.
3) Once a text file (.txt extension) is submitted, CCHE’s server opens the file and counts the number of characters per row. If any row in the file is not the specified length (i.e., 47 characters for Degree file), an error message is displayed to the user stating that the file was not received by CCHE because the data is not in the fixed-length format (refer to Data Dictionary for rules). The user must resubmit a valid fixed-length file.
4) When a text file is submitted and all rows of data are of the correct fixed-length, the file is then submitted. “Importing File…” is displayed.
5) After the importation, the next phase of the validation process begins. “Validating File…” is displayed. CCHE iterates/loops through each row sequentially and begins to validate the data based on rules clearly defined in the data dictionary.
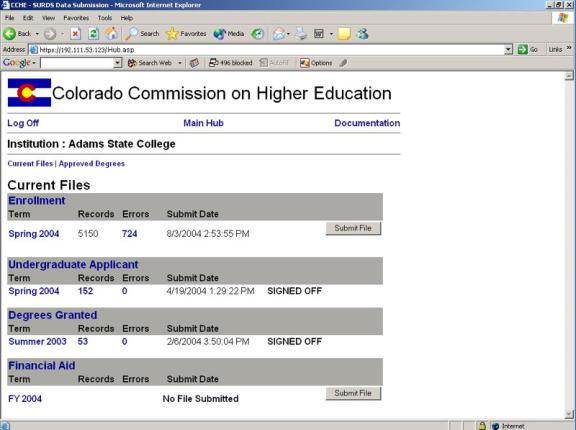
6) After validation is finished, the user will encounter 1 of three possible scenarios.
(Figure 10)
a. Text file is free of errors
i. Reports are available by clicking the link under the “Records” header displaying the number of records submitted.
ii. If satisfied with the reports, begin the sign-off process. If unsatisfied with the reports, the user can resubmit a file.
b. Text file contains errors
i. Click the link under the “Errors” header displaying the number of errors. The error summary page will be displayed (Figure 11)
ii. On the Error Summary page, the user can browse the error codes, descriptions, and total number of errors. By clicking the “Error Id” for the specific error, the user can view all the data that is in error.

(Figure 11)
iii. Error Detail (Figure 12) displays the error details including all of the data that is in error. Under the “Invalid Fields” header, all fields that are involved in the error are displayed on the left side of the table and have links to the Field Definitions page.
iv. Under the “Full Record” header, the entire data record is displayed with appropriate field headers to view why this record is in error and assist in locating the record for correction.
v. This table can be downloaded into Excel by clicking “Download Excel Version.”
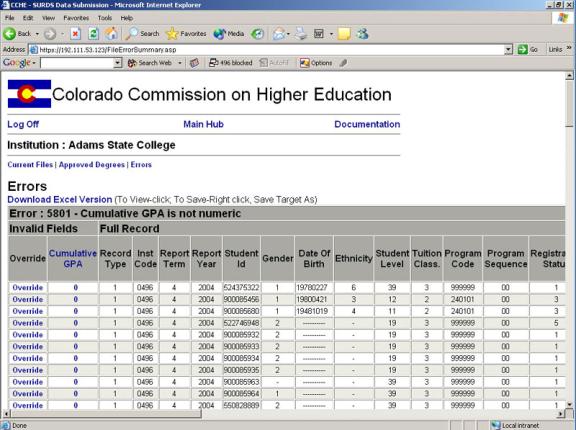
(Figure 12)
![]()
SIGNING OFF ON A FILE
From the main Hub page, when the file/data being validated contains zero errors, the user is displayed with a link entitled “Sign Off.” The user will receive preliminary message (See Figure 13). Click “Continue.”
On the summary page, review the information for the file that is to be approved. When the information is correct, click “Send of CCHE” to finalize the approval. (See Figure 14)
Once the file has been signed off, the user is unable to submit more files for this file type/report term/report year. The reports remain available for this approved data.
![]()